Creating & Running Service Flows
A running workflow template is called an Instance. Let's look at how to start a workflow and enter details step-by-step.
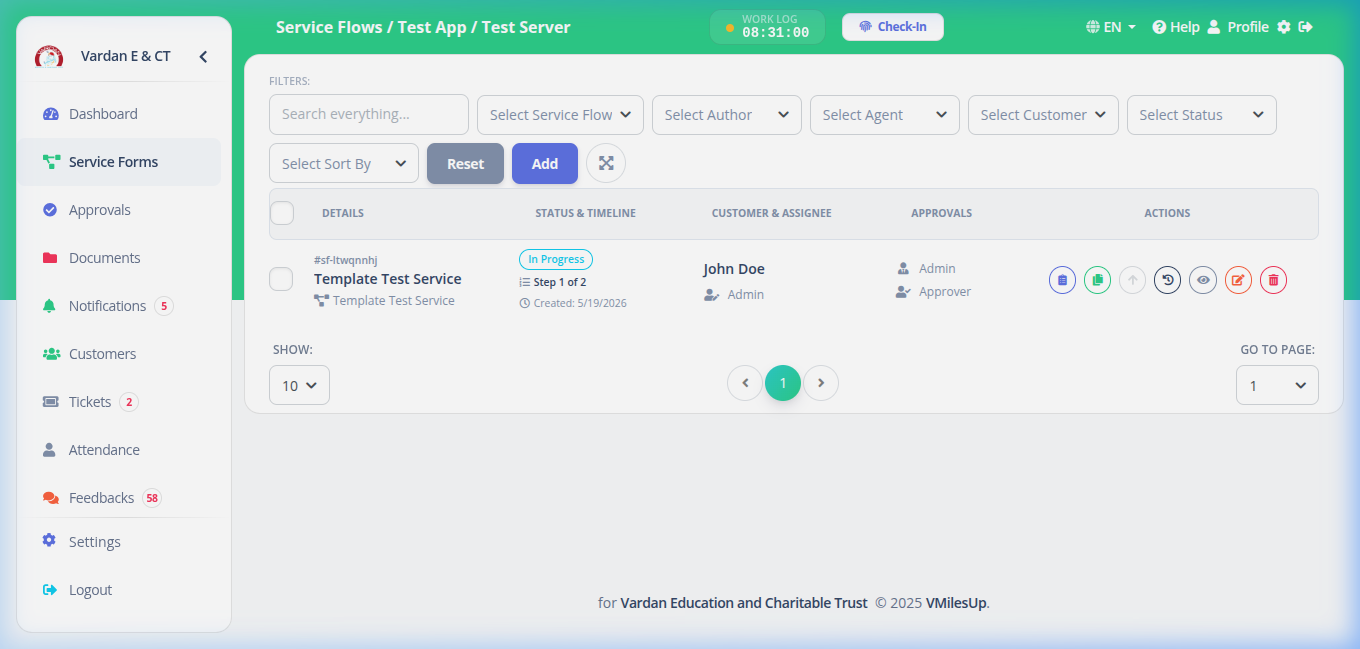
Instance CRUD Operations & Search Filters
Once workflow instances are launched, you can track them on the main Service Flows board. Below are the CRUD buttons and filter options available:
Step 1: Starting a Flow (Create Instance)
To start a new service flow:
- Navigate to the Service Flows tab on your dashboard.
- Click + Create Service Flow.
- Select the Template (e.g. "Residential Fiber Installation").
- Select the Customer and the Field Agent.
- Select the Initial Approver (who will review your first step).
- Click Create. A unique Reference ID (e.g.,
SF-20260519-0001) will be generated.
Step 2: Entering Step Fields & Groups
Once the flow starts, it is placed in the first step. Open the flow details page to enter data:
Field Groupings
To make complex data entries readable, fields are often grouped in blocks (like "Company Details" or "Billing Details"). Each group has a title and holds fields that belong together.
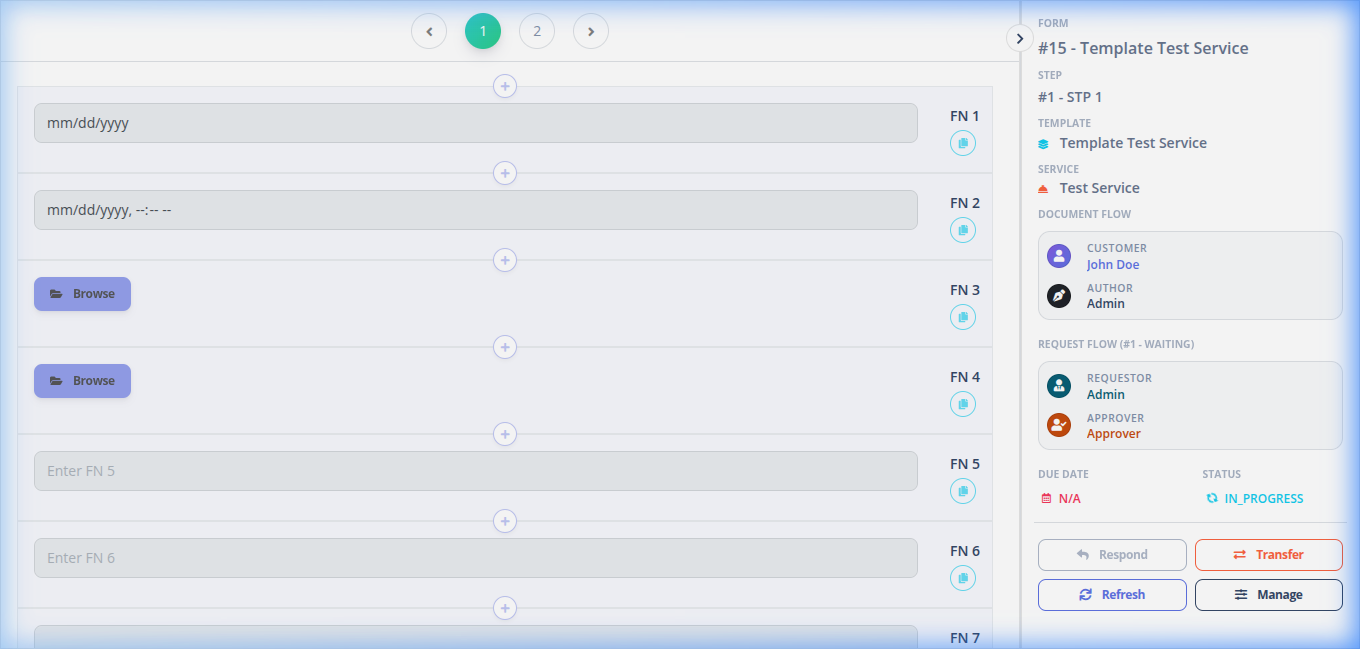
Example Step Data Entry Screen:
Step 1: Contract Signing
File Management & Customer Directory Scoping
When uploading or selecting files for step fields (such as contract scans or ID cards):
- Auto-Created Folder: Creating a Service Flow automatically generates a customer-specific folder named
Customer Name [Short UUID]in the background storage (using the customer's unique 8-character uppercase ID, e.g.,0LINCAYF). - Scoped File Browsing: Clicking the Browse button inside any file field automatically opens the File Manager with the root folder set specifically to that customer's directory, ensuring you only access and manage files relevant to this client.
- Download Restriction: When viewing file or image previews within the service flow form, the Download button is restricted and only visible to Manager and Admin roles.
Step 3: Form Access Control & Edit Permissions
A crucial part of the Service Flow engine is data integrity. Whether a step's form fields and "Save" buttons are editable depends strictly on a combination of the Flow Status, Step Status, and your User Role/Actor status.
Step 4: Saving and Requesting Approval
As you work on the fields, you can save your progress by clicking Save Draft. When all mandatory fields are complete, click Request Review to freeze your inputs and generate a pending approval task for the approver.
Backend Validation & Trigger Calculations
When you click Request Review, the backend executes the following checks and triggers:
- Lenient Drafts vs. Strict Submit: Click
Save Draftto skip validations (saves partial/incomplete values). But clickingRequest Reviewperforms strict field validation. If a required field is empty, the database rejects the submission. - Progress Rate Calculation Hook: The system automatically calculates progress:
Progress % = (Completed Steps / Total Steps) * 100This percentage is recalculated in real-time by a database model trigger whenever a step is signed off. - Auto-Complete Transition: When the final step of a template is approved, the system hook transitions the instance status to
COMPLETEDand flags all inputs as permanently read-only.